Link to Full Course:
https://www.ui5cn.com/courses/fiori-for-developers
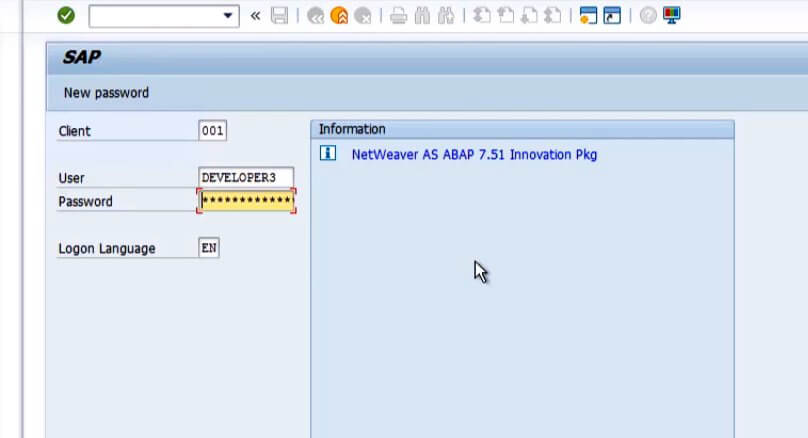
- Step 1 – Login to our system with the newly created user which is DEVELOPER3 and it will ask to change our previous password.
![]()
![]()
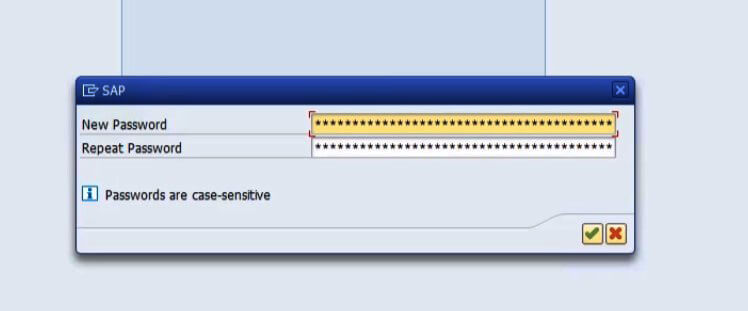
- Step 2 – Give a new password and there are some pre-checks for the password, some of which include that the password should not be the same as the previous password and it should be having 8 characters.
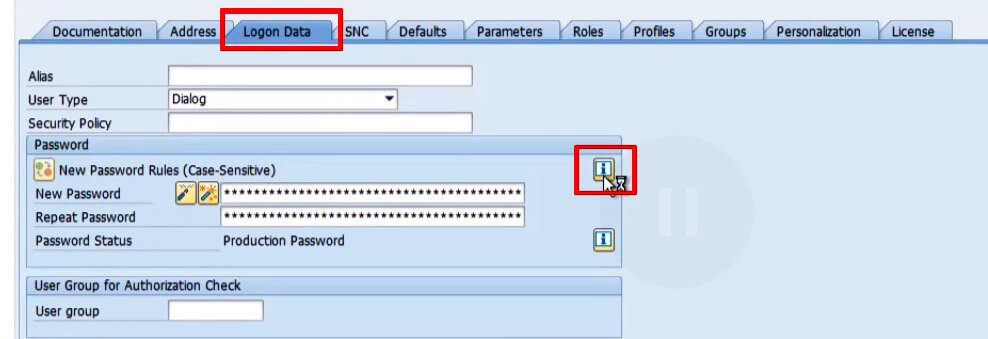
- Step 3 – Using T-Code SU01 we can see login information of the user as well, we can click on information Icon to check the rules and regulations about the password as well.
![]()
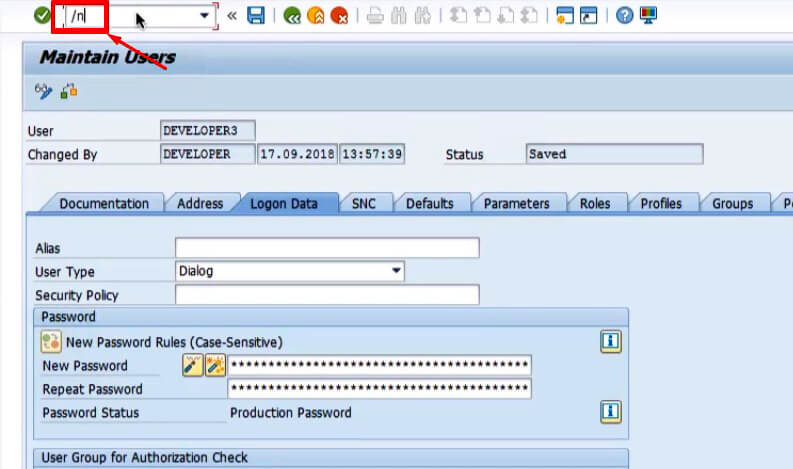
- Step 4 – Now we are in a new User Login and then we have to go into the Fiori® Launchpad using the URL. Now to find the URL for Fiori® Launchpad, go to the Start-up and then using /n go into the Home Screen.
![]()
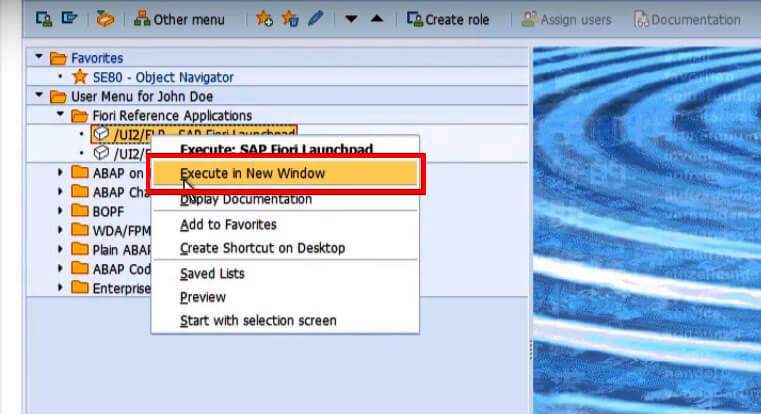
- Step 5 – We will see the Fiori® Launchpad and right-click on /UI2/FLP – SAP Fiori® Launchpad and Execute in New Window.
![]()

![]()
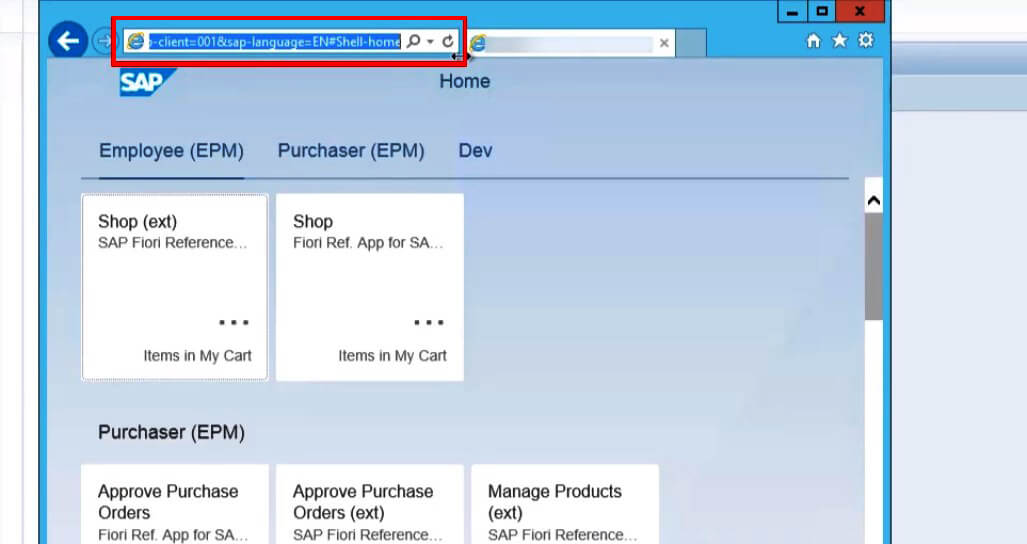
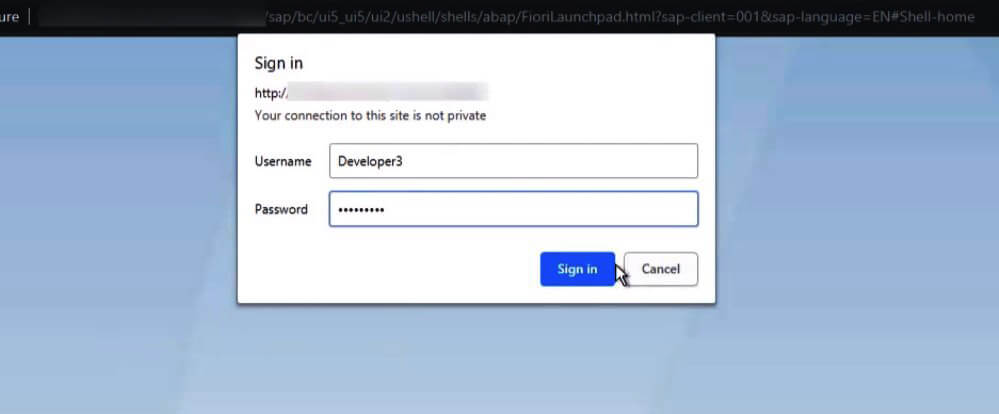
- Step 6 – It opens in Internet Explorer then copy the Fiori® Launchpad URL then go to Chrome (Browser Choice for Development) and open a new incognito window, it would ask for credentials of this new user which is DEVELOPER3.
![]()
![]()
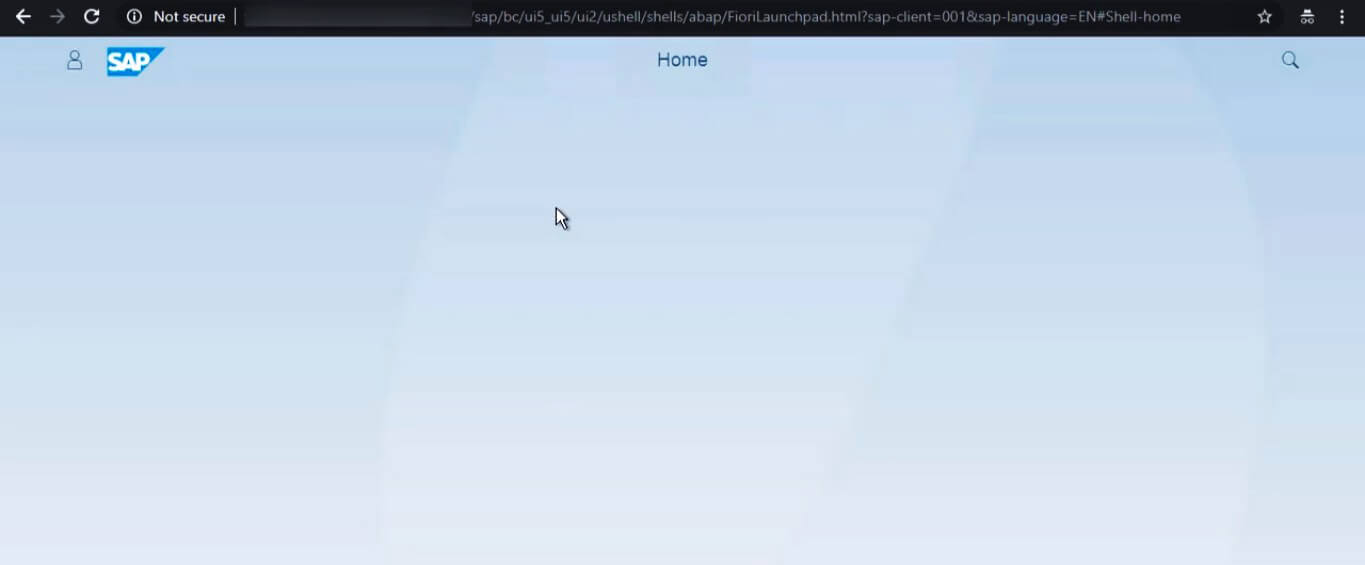
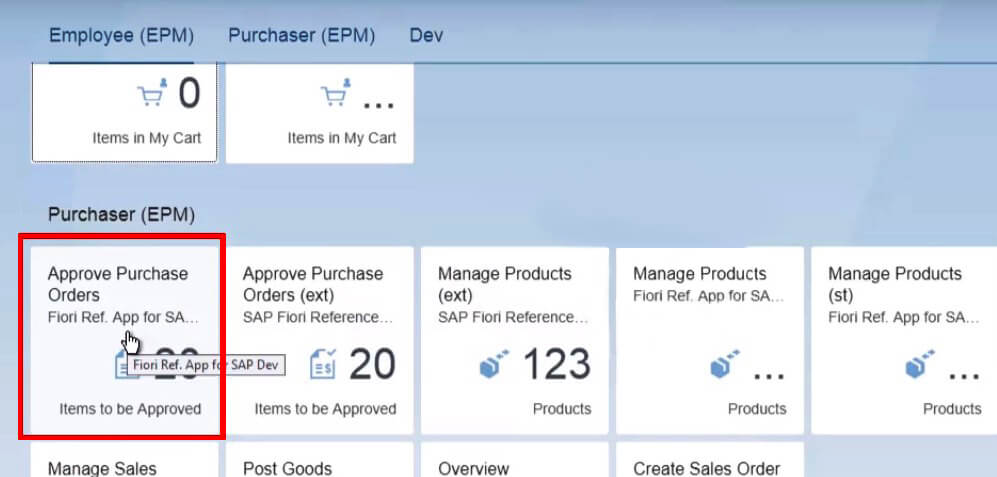
- Step 7 – Now we get a blank screen because we have not added any application to our Launchpad of DEVEOPER3. So our objective is to provide this user with our Purchase Order App access.
Now we will log in with Admin User in Fiori® Launchpad to configuration Approve Purchase Order App which we are basically going to provide access to the App to DEVELOPER3.
![]()
![]()
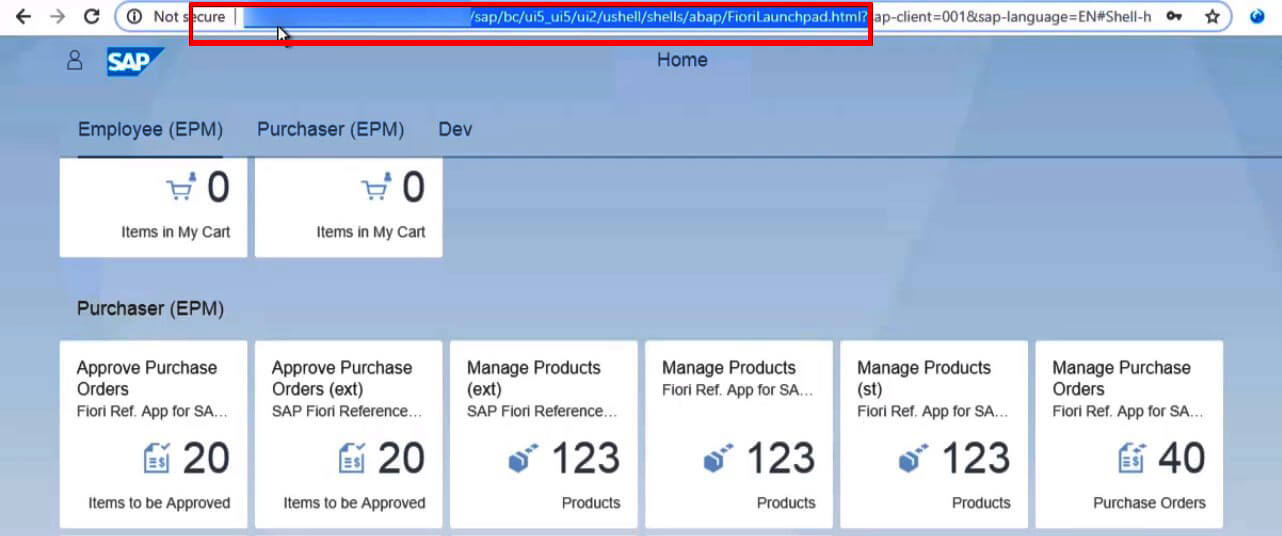
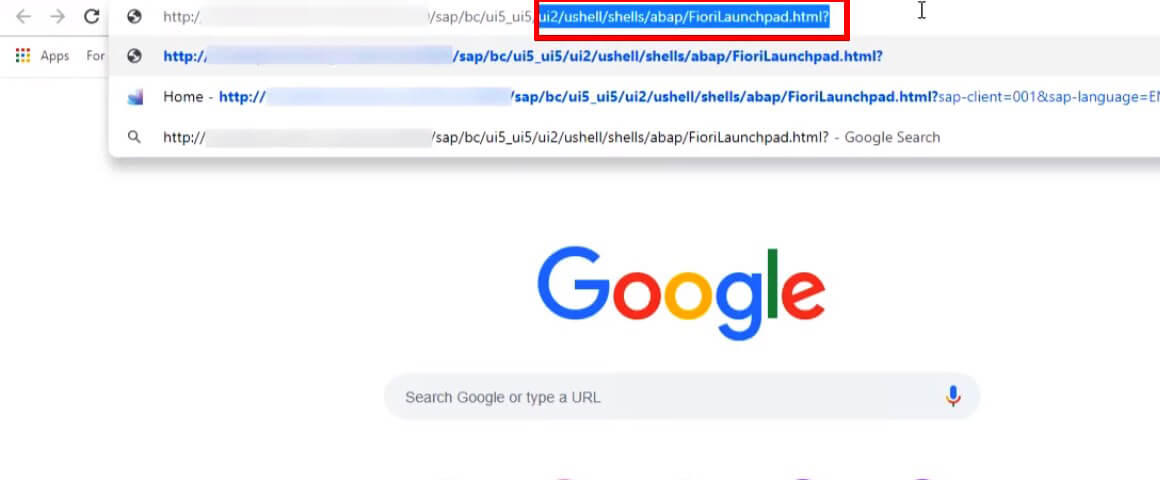
- Step 8 – Go to Launchpad Configurator(With Admin User). To get the Launchpad Configurator URL we would be replacing existing URL from “/ui2” with “sap/arsrvc_upb_admn/”(as shown in image below). This will basically use the service ‘arsrvc_upb_admn’ and we have to go into main.html.
We can check the service in our SICF Transaction, which is responsible for Catalog and Group Management.
![]()
![]()
![]()

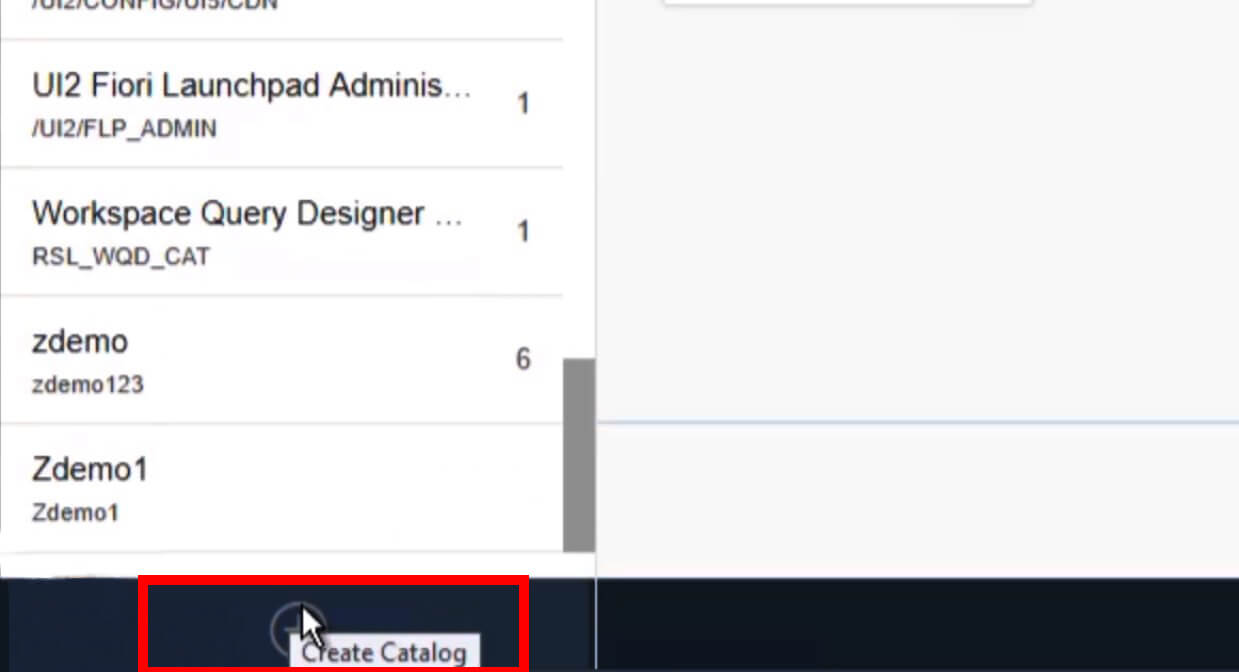
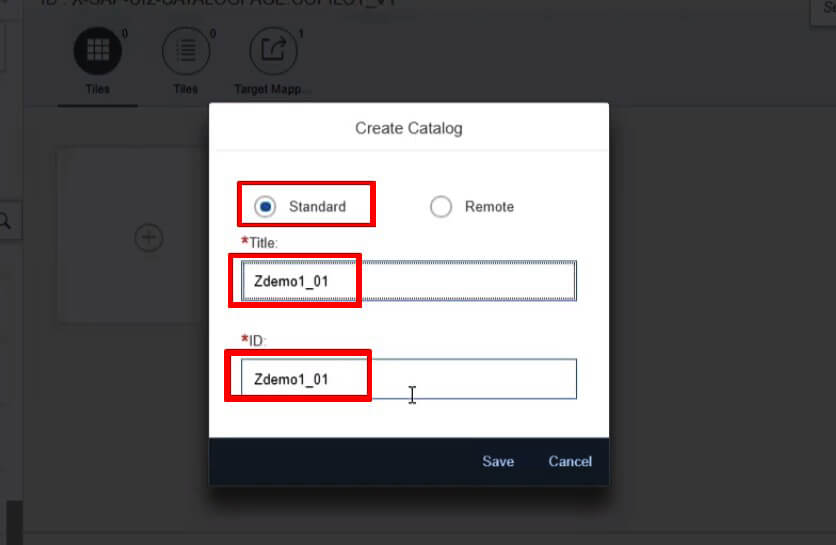
- Step 9 – We will be creating a new Catalog for that click on + Icon which is present in the bottom left side of the screen. The Catalog will be a Standard Catalog and for now let’s name it as Zdemo1_01 and unique ID Zdemo1_01, then click on Save.
![]()
![]()
- Step 10 – In this step, we have seen how to Create Catalog, to Configure Fiori® Apps we need to Create Semantic Object Next and Action. Then Provide this Role With Target Mapping.
To view all the steps of Fiori® App Configuration you can Enroll in Fiori® for Developers Course With UI5CN here:
https://www.ui5cn.com/courses/fiori-for-developers
SAP® Fiori® Blog Series Links :
- SAP® Fiori® Launchpad Configuration – Starting with Catalog Creation (Current Blog)
- Understanding SAP® Fiori® Launchpad and Tiles Types
- SAP® Fiori® – Understanding Fiori® Catalogs, Tiles, Roles and Groups (Blog Comming Soon)
- Fiori® Applications Types and Architecture (Blog Comming Soon)
- Types of Fiori® Apps – Transactional Fiori® Application Overview and Architecture (Blog Comming Soon)
- Fact Sheet Fiori® App Architecture | Fact Sheet Applications | Types of Fiori® Application (Blog Comming Soon)
- Analytical & KPI Fiori® App Architecture | Analytical Fiori Application | Types of Fiori Application (Blog Comming Soon)
- SAP® Fiori® Architecture and Component | SAP® Fiori® Components | Fiori® Architecture (Blog Comming Soon)