Posted on

Understanding Model Context Protocol (MCP) for SAPĀ® Development

Introduction to Model Context Protocol (MCP)

When you interact with a Machine Learning Model—often referred to as an LLM, or Large Language Model—it needs to have knowledge of the specific type of work you want it to perform in order to be truly useful.

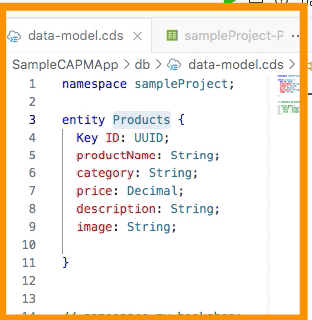
For instance, if you want to carry out CAPM (Cloud Application Programming Model) or SAPUI5 development, the LLM needs to internally understand the different concepts behind these frameworks. It must know their specific syntax and functioning to generate accurate code.

Most of the time, you are interacting with LLMs trained on massive amounts of data available on the internet. During its original training, an LLM consumes data spread across blogs, open repositories, help documents, and more. It then generates output based on this general learning.

Often, generic, general-purpose LLMs have consumed information on terms and topics across multiple domains. When we demand expertise from these LLMs for a highly specific task, you might not get the best outcome unless:

  • The LLM has been explicitly trained or fine-tuned on domain-specific large datasets.
  • You are using an extremely large model (e.g., 200+ billion parameters) that already possesses comprehensive, in-depth knowledge and domain expertise in your field.

Another way to achieve this is by providing the LLM with the context of your domain. If the LLM understands basic logical operations, it can derive linkages from your specific domain context.

For example, imagine you provide an SAP® CAPM help document to an LLM that has limited prior knowledge of CAPM coding. Internally, it might be well-versed in JavaScript and other open-source stacks, but because CAPM isn’t entirely open-source, the model might lack extensive training in CAP programming specifically.

How Chunking and Context Work

Rather than passing an entire help document to the AI, you divide the development practices into different sections based on the specific activities that need to be carried out. In LLM terminology, these individual sections are referred to as chunks.

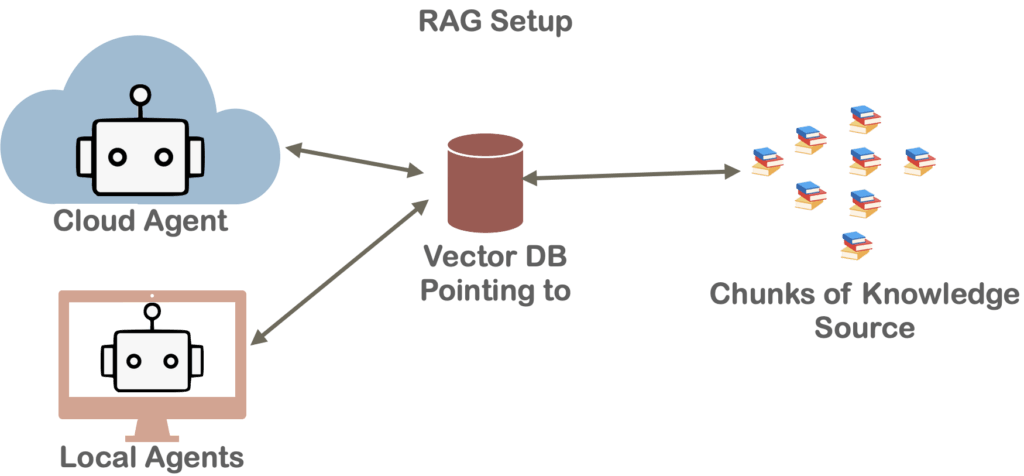
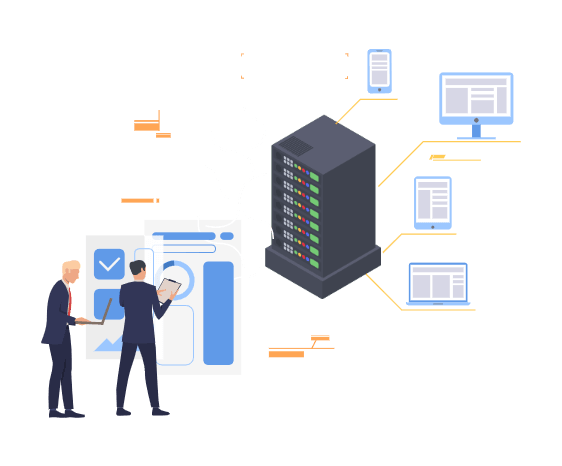
Once you have divided the entire help document into chunks based on relevance, you pass only the chunks the LLM currently needs to know. The reason for this is the context window (or working memory) limitation; passing an entire document requires significantly more processing power and VRAM. Therefore, based on the specific task, you pick the relevant chunks and pass only those. This is typically managed using a Vector Database (Vector DB), which stores and retrieves these chunks based on the user’s task to provide context to the LLM.

It can also happen that, instead of a static help document, you are talking to a live system and extracting information in real-time. The system can provide data records on the fly based on what is requested.

Enter the Model Context Protocol (MCP)

This entire process of dynamically providing data is being standardized through the Model Context Protocol (MCP). Through MCP, you pass data into the LLM’s context. In simple terms, you extract relevant information and dynamically feed it into the LLM’s working memory.

The Model Context Protocol (MCP) is an open standard and open-source framework introduced by Anthropic to standardize the way LLMs integrate and share data with external tools, systems, and data sources. MCP provides a standardized interface for reading files, executing functions, and handling contextual prompts. The entire MCP protocol operates as an open standard (now hosted under the Linux Foundation).

MCP gives everyone a single, agreed-upon standard—much like the USB-C standard for hardware—allowing you to connect external data to AI systems using an open and common framework. Under the hood, MCP uses a client-server architecture powered by a lightweight messaging format called JSON-RPC 2.0.

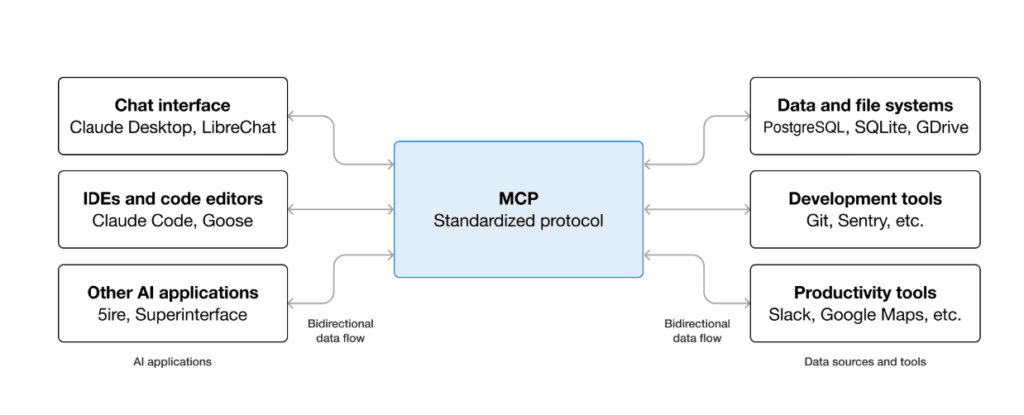
[Image Source: https://modelcontextprotocol.io/docs/getting-started/intro]

Here’s the basic picture:

  • An MCP Server is a program that exposes a capability—like “read this database” or “create a sales order.”
  • An MCP Client (usually your AI assistant or the app it lives in) connects to that server and uses those capabilities.
  • The Protocol itself is simply the shared language they use to communicate.
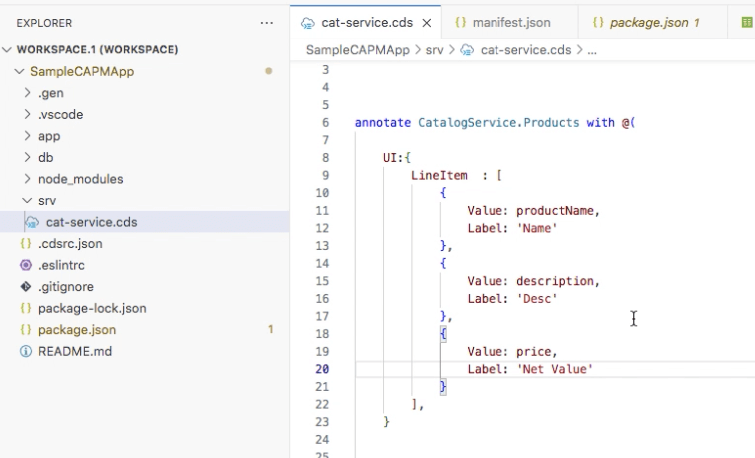
MCP in Development

When we build SAPUI5 apps from scratch or extend existing functionality, dedicated MCP tools are provided to help standardize the LLM’s responses.

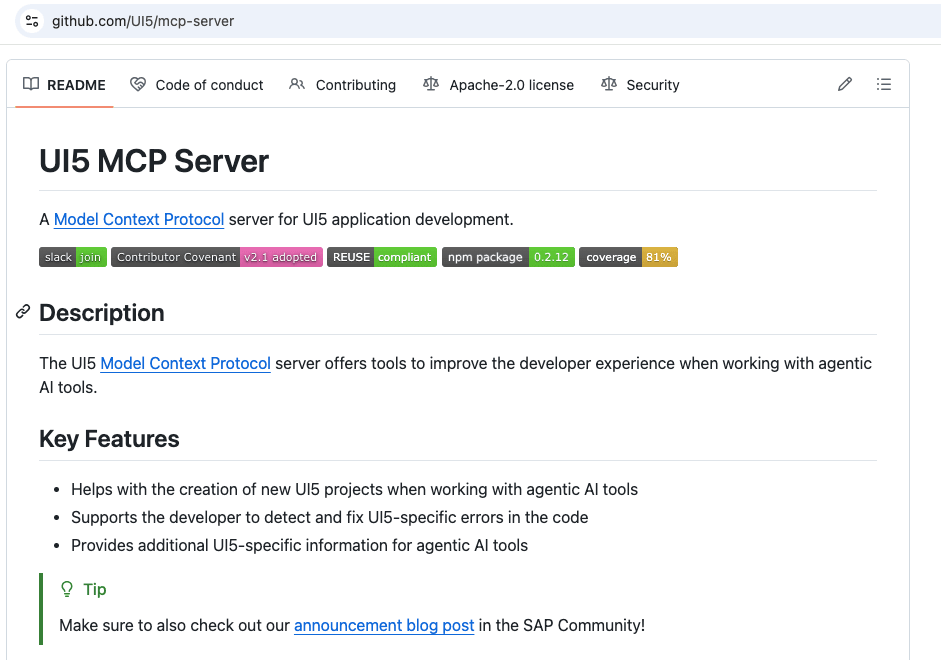
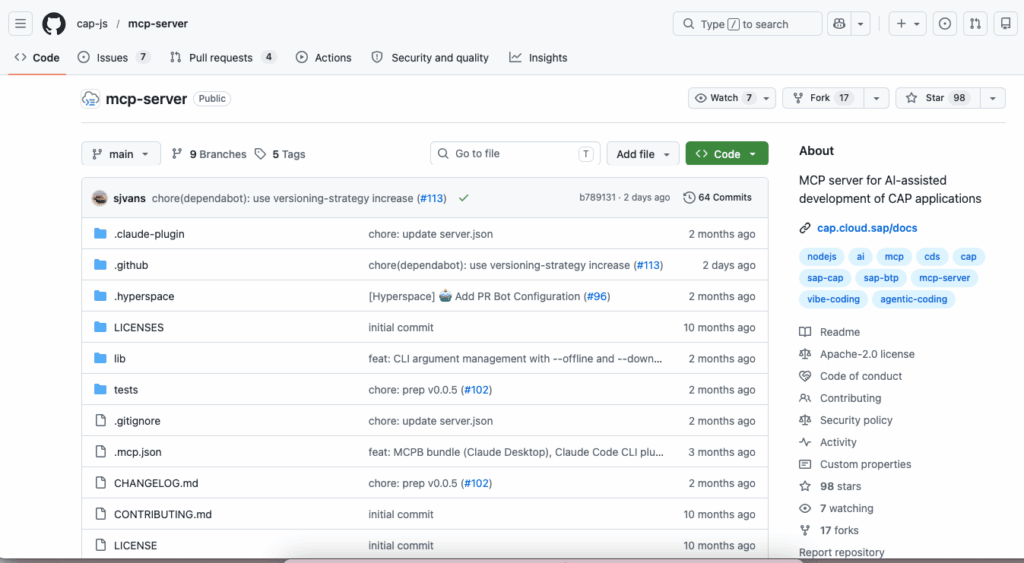
The UI5/mcp-server and cap-js/mcp-server are specialized MCP servers designed to enhance AI-assisted development within the SAP® ecosystem:

  • The UI5 Server: Equips AI agents with tools to scaffold UI5 applications, validate manifests, and pull specific UI5 API documentation and best practices.

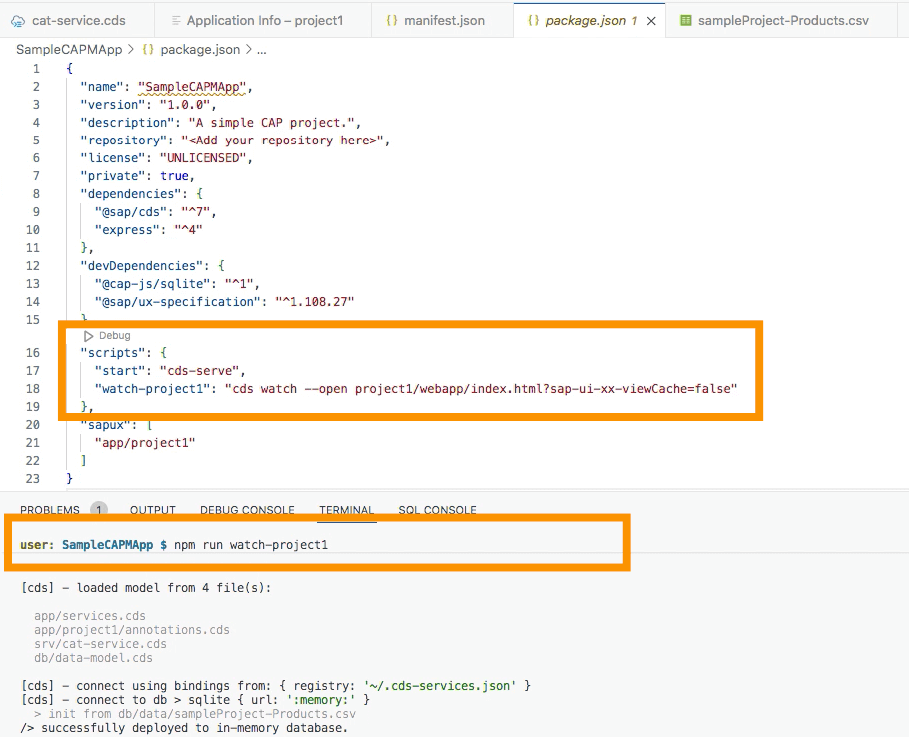
  • The CAP Server: Empowers AI models to natively understand the SAP® Cloud Application Programming Model by allowing them to fuzzy-search CDS model definitions and perform local, vector-based semantic searches through CAP documentation.

As an SAPUI5 and SAP® CAPM developer, if you are building apps by directly interacting with AI agents like Claude, Codex, or others, you will find that the agents initially generate code based solely on their pre-existing training for that framework. Adding MCP support to your coding agent will further boost accuracy, steering the AI toward not only more standardized code but also more accurate, best-practice-based outcomes.

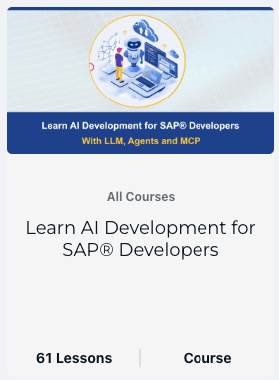
Want to learn more? If you want to dive deeper into how you can develop apps using SAPUI5 and SAP® CAPM with MCP, we highly recommend the UI5CN Learn AI Development for SAP® Developers course. It covers these topics alongside others, such as: working with AI and LLMs, using agents (like Claude, Codex, and Cline) to run LLMs, practical hands-on LLM usage, SAP® MCP, AI SDKs, and more!

Posted on

SAPĀ® FioriĀ® Elements with SAPĀ® CAPM App


Learn to Create and Use SAP® CAPM Apps with SAP® BAS!

Hey there, SAP® Tech Masterminds! We’re thrilled to bring you a fun and easy two-part blog series. We’ll guide you through creating and using SAP® CAPM Services in SAP® BAS for your SAP® Fiori® Element Apps.
Whether you’re new to coding or a seasoned expert, these blogs are for you. Let’s get started!


Part 1: SAP® Fiori® Elements with SAP® CAPM App – Sample SAP® CAPM App

Imagine you, a cozy drink, and your laptop. Now, follow the simple steps to create your simple SAP® CAPM app. In this first blog, you’ll learn:

  • Step-by-step instructions to build your SAP® CAPM App and its oData V4 services.
  • You can perform these steps in SAP® BAS IDE.


Part 2: SAP® Fiori® Elements with SAP® CAPM App – SAP® Fiori® Element App

Now that you’ve built your SAP® CAPM app, it’s time to put it to work. In the second part of our series, we’ll show you how to:

  • Connect your CAPM services to SAP® Fiori® Elements apps.
  • Turn your services into awesome, user-friendly apps using SAP® Fiori® Elements.
  • Follow simple, clear instructions to make everything work smoothly.

So grab your favorite snack, get comfy, and join us on this coding adventure. Stay tuned for the first part – it’s going to be amazing!


Also, to Learn Fiori® Elements using SAP® CAPM and SAP® RAP you can enroll in the course Learn SAP® Fiori® Elements where we will learn in a Step-by-Step Fashion the development of Apps Using Fiori® Elements.

For the best offers on the course check the Offer Page.


Posted on

SAPĀ® FioriĀ® Elements with SAPĀ® CAPM App – SAP® FioriĀ® Element App

In this Blog, you will see how to use the CAPM App Service created in the last section and create a SAP® Fiori® Elements App.


Table of Contents:

Start the Series from: SAP® Fiori® Elements with SAP® CAPM App

Go to last the Blog from: Sample SAP® CAPM App Setup

Go to the Course from: Learn SAP® Fiori® Elements from


1. Create Fiori® Element App

Create a Fiori® Element App from the Template in SAP® BAS using the below steps:

  • Select List Report Template Using File > New Project From Template [Screenshot below]
  • In the Data Source Screen, select Local CAP Project > Project > Catalog service [Screenshot below]
  • In the next screen select the Products Entity
  • In the next screen keep everything default and select Finish
  • The SAPUI5 App will be created inside the CAPM project app folder


Selection of List Report Template


Service Selection SAP® CAPM


2. Start Script

After that you will find the script to run the project from the root with the command:

npm run [start-or-watch]


3. Add Line Item

Now add LineItem annotations in the Service:

annotate CatalogService.Products with @(

   UI: {
      LineItem: [
{ Value: productName },
{ Value: category },
{ Value: price }
      ] 
    ]
   }
);

This will show 3 columns productName, category and price.


Add Line Item Annotations to the Service

Output of LineItems Annotations

Similarly, now we can add more Annotations using the codes below.

4. HeaderInfo:

Now in the same service file, we can change the default Label of what Kind of Items is shown from Product or Products in the Header columns.

HeaderInfo: {

            TypeName: 'Item',

            TypeNamePlural: 'Items',

        }

5. Header Details

Now to add navigation, we can show the image, title and description for the below code:

    HeaderInfo: {

            TypeName: 'Item',

            TypeNamePlural: 'Items',

      TypeImageUrl: image,

            Title: {

                $Type: 'UI.DataField',

                Value: productName,

                Label: 'Product'
            },

            Description: {

                $Type: 'UI.DataField',

                Value: price

            }

          }

6. FieldGroup

We can also Group together different fields using FieldGroup and show them together:

FieldGroup #Overview: {

          $Type : 'UI.FieldGroupType',

          Label: 'Overview',

          Data: [

            {

            $Type: 'UI.DataField',

            Value: productName

            },

            {

            $Type: 'UI.DataField',

            Value: price

            }

          ]

        }


7. Facets Using FieldGroup

Also, we can add many FieldGroup using Facets to the Screen with different tabs with the below codes:

Facets: [
                     {

                          $Type : 'UI.ReferenceFacet',

                          Label:'Overview',

                         Target: '@UI.FieldGroup#Overview'

                        },

                        {

                          $Type : 'UI.ReferenceFacet',

                          Label:'Tech Details',

                         Target: '@UI.FieldGroup#TechDetail'

                        }

         ]

Tabs will be created and different Groups will have information on the Fields associated with the Group.

8. Nesting of Facets


Now we can also use Collection Facets to Nest multiple Facets Together.


Here you will see that the collection doesn’t create tabs but groups them together.


Note: It is mandatory to define an ID for collection facets but optional for reference facets.

           Facets: [
                        {

                          $Type : 'UI.CollectionFacet',

                          ID    : 'FacetIdentifier1',

                          Label:'Read Overview',

                              Facets  : [

                                {

                                  $Type : 'UI.ReferenceFacet',

                                  Label:'Overview',

                                  Target: '@UI.FieldGroup#Overview'

                                },

                                {

                                $Type : 'UI.ReferenceFacet',

                                Label:'Tech Details',

                                Target: '@UI.FieldGroup#TechDetail'

                              }

                          ]

                        }

              ]


Also, you can make two collection Facets and have details within each other

Facets: [
                     {

                          $Type : 'UI.CollectionFacet',

                          ID    : 'FacetIdentifier1',

                          Label:'Read Overview',

                              Facets  : [

                                {

                                  $Type : 'UI.ReferenceFacet',

                                  Label:'Overview',

                                  Target: '@UI.FieldGroup#Overview'

                                }

                          ]

                        },

                        {

                          $Type : 'UI.CollectionFacet',

                          ID    : 'FacetIdentifier2',

                          Label:'Read Overview',

                              Facets  : [

                                {

                                $Type : 'UI.ReferenceFacet',

                                Label:'Tech Details',

                                Target: '@UI.FieldGroup#TechDetail'

                              }

                          ]

                        }

              ]


The final result will look similar to the screenshot below in the Navigation Details Screen. Based on the Nesting of Navigation the Final Result will differ.

Fiori® Elements Navigation Screen


Good practice is:

1. Not do the nesting more than 3 levels.

2. Not referencing more than 1 Reference Facets per collection or you will face rendering issues.


Posted on

SAPĀ® FioriĀ® Elements with SAPĀ® CAPM App – Sample SAPĀ® CAPM App Setup

In this blog, you will see how to set up the setup SAP® CAPM App in SAP® BAS:


Table of Contents:

Start the Series from: SAP® Fiori® Elements with SAP® CAPM App

Go to the next Blog from: SAP® Fiori® Elements with SAP® CAPM App – Fiori® Element App

Go to the Course from: Learn SAP® Fiori® Elements from


1. Create a SAP® CAPM Project to generate sample files and structure. In the BAS CLI you can write:

cds init sample-project

Some of the files created in the project like the data CSV file and the app folder will be added in the coming steps:

SAP® CAPM Project creation


2. Go to the db folder and create a file data-models.cds to add the schema:

namespace sampleProject;

entity Products {
  key ID: UUID;
  productName: String;
  category : String;
  price : Decimal;
  description : String; // New field for product description
  image : String; // New field for image URL
}

3. Add sample data values inside the data folder in a CSV file and name it project-Products.csv:

ID;productName;category;price;description;image
"e3b0c442-98fc-1c14-9fb0-c4e9b3c77c63";"Laptop";"Electronics";999.99;"High-performance laptop for professionals";"https://i.ibb.co/WWfNSgp/openui5.png"
"fe3a9ec0-93d6-2f3b-ad7c-c8f330b7606c";"Smartphone";"Electronics";599.99;"Latest model with advanced features";"https://i.ibb.co/WWfNSgp/openui5.png"
"b4e9b3c7-7c63-4e3b-0c44-29fc1c149fb0";"Coffee Maker";"Home Appliances";49.99;"Brews perfect coffee every time";"https://i.ibb.co/WWfNSgp/openui5.png"

SAP® CAPM Data Model


4. Create a basic service inside the srv folder in the file catalog-service.cds :

using sampleProject from '../db/data-model';
service CatalogService {
entity Products as projection on sampleProject.Products;
}


5. We have created a SAP® CAPM App to explore which can be used in a Fiori® Element Template, so let’s start making that.
Note, that this SAP® CAPM App will be used in the Fiori® Element Template, so we need to keep the App running and create a new Project From Template which we will do next.

To run the App we can use the Start Script of the App from the package.json file:

npm run start

or

npm run [watch-project-name]

Running SAP® CAPM App

Posted on

#7 Deploy App to SCF in SAPĀ® CAPM – 7 Steps to Get Started With SAPĀ® CAPM

Before we begin!

In this 7 blog series, we are going to provide a small end-to-end scenario to work with SAP® CAPM. Here the usecase we are going to use is of Learning Management System(LMS) and build a Student List App and Deploy it to SCF.

Link to Master(or Main) Blog from which all the other blogs can be reached is Here.

  • If you wanted to check out the detailed course on SAP® CAPM the link is Here.
  • If you want to get learn SAP® Cloud Platform Development in Detailed then we have a 35hrs hands-on course Here.
  • For current offers and discounts check offer page Here.

In this section we are going to deploy our App to SAP® Cloud Foundry(SCF) in SAP® Cloud Platform(SCP)


Step 1: Building DB Artifacts

Till now, we were using sqlite3 Database in the local environment to test. Now we will use HANA® DB in Cloud or HDI Container(which comes with Free Trial of SCF).

To deploy our database artifacts i.e the cds which describe the structure and csv data. We need to first convert it to SQL, in which the HDI container/HANA® DB can process the creation of the table and loading of data.

For this we need to build our db artifacts, this we do by opening .cdsrc.json and adding the content as shown below


{

"build": {

"target": "gen",

"tasks": [

{ "src": "db", "for": "hana", "options": { "model": ["db", "srv"] } },

{ "src": "srv", "for": "node-cf", "options": { "model": ["db", "srv"] } },

{ "src": "app", "for": "node-cf" }

]

}

}


Note: In this case, we are telling the CAPM to create a build inside folder gen(which will get created once we run cds build/all command). And inside the gen folder, we will get db, srv and app build code.

For our purpose, we only need db artifacts so the above .cdsrc.json code can be just for db build as shown below


{

"build": {

"target": "gen",

"tasks": [

{ "src": "db", "for": "hana", "options": { "model": ["db", "srv"] } }

]

}

}

Step 2: cds build/all to Build Artifacts

Now let’s start the build process which will read the .cdsrc.json file and create a gen folder and add all the build artifacts inside it


cds build/all

Step 3: Create the HDI Container in SCF

Now lets, create the HDI container in the cloud. We can do it manually with Cockpit UI or with CLI. Below us CLI Code which you can execute after you are logged in to your SCF account from CLI


cf create-service hanatrial hdi-shared somedbname

In this case, the SAP® Cloud Foundry service is hanatrail, the plan is hdi-shared and somedbname is your HDI container name.

Step 4: Change package.json DB

Open the package.json file from the project directory and update the place we have sqlite to hana i.e. from "kind": "sqlite", to "kind": "hana",.

Here, we are telling CAPM App to use HANA® DB(or HDI) connection setting


{

"name": "democds",

"version": "1.0.0",

"description": "Generated by cds init",

"repository": "<Add your repository here>",

"license": "ISC",

"dependencies": {

"@sap/cds": "^3.18.4",

"express": "^4.17.1",

"hdb": "^0.17.1",

"sqlite3": "^4.1.0"

},

"engines": {

"node": "^8.9"

},

"scripts": {

"start": "cds run"

},

"cds": {

"requires": {

"db": {

"kind": "hana",

"model": [

"db/",

"srv/"

]

}

}

}

}


Note: You can also run command to uninstall sqlite3 from the project if you face exit status 14 error while deploying the app to SCF with below command

npm uninstall sqlite3

or Just remove the sqlite3 dependencies from package.json.

Step 5: Create YML

To deploy our App in cloud we can either use mta.yml or manifest.yml.

Note: .yml and .yaml are both extensions of YML descriptor file and are same. But mta.yml and manifest.yml are both different kinds.

You can think mta.yml as an advanced version of manifest.yml where you have more features like adding resource bundles, also when an app is deployed with mta.yml file then in client-side a compressed zip file is created with all Apps artifacts and then this zip file is deployed to Cloud. In the case of using manifest.yml file while deploying, all files are uploaded sequentially and no zip file is created locally as in the previous case.

In our case, we use manifest.yml file in the root of the project for simplicity as shown below

Create a new file named manifest.yml


touch manifest.yml

Add Deployment information to manifest.yml file as below:


---

applications:

- name: hdbApp

path: ./gen/db

memory: 256M

health-check-type: process

services:

- somedbname


- name: newApp

path: ./

services:

- somedbname

Here, we are first deploying the db artifacts which will create the tables in HDI container(or HANA® DB) and Add data. After that, we deploy the newApp, which will deploy our CAPM App.

Step 6: cf push and Test

For deploying App in Cloud you can use the command


cf push

Which needs to be done in the root of the Project, where you see your manifest.yml file you created.

Output of the application will be

Fiori Launchpad:

Output Fiori Launchpad


Data of Students:

Output Fiori Launchpad


🙂 Congratulations! You have completed this series.


Before we end!

In this 7 blog series, we are going to provide a small end-to-end scenario to work with SAP® CAPM. Here the usecase we are going to use is of Learning Management System(LMS).

Link to Master(or Main) Blog from which all the other blogs can be reached is Here.

  • If you wanted to check out the detailed course on SAP® CAPM the link is Here.
  • If you want to get learn SAP® Cloud Platform Development in Detailed then we have a 35hrs hands-on course Here.
  • For current offers and discounts check offer page Here.