Posted on

Why and how to take your UI5 skills to next level

After becoming proficient with UI5. You might be working with 3 kinds of project.
 

    1. The first kind of project is where you are supporting an existing SAPUI5/Open UI5 project. Finding bugs, fixing those bugs and working on a lot of debugging.
    2. The second kind of project is where you are deploying or supporting an existing application build with Fiori or UI5, most of the application require some enhancement of existing features or small customization.
    3. The third kind of project is where you work in custom development using UI5 library from scratch.

When it comes to working on the custom development project which allows a developer to work on new and innovative solution, it not only allows them to improve and advance the skill level and knowledge but also when you are part of the innovative solutions and projects your contracting rates and consulting rates are higher than the market average.

The most challenging aspect here is able to get right opportunities which require these skills and getting prepared for the opportunity when it comes. The skills required here are advanced and which require little mastery and hands-on on core library customization and understanding of Ā how to use new elements like maps, 3rd party library, 3rd party analytics framework etc.
Keeping that in mind we have come up with a course which will help you be prepared and take your UI5 skills to next level.
 
A short intro video to the course :


Course Gift coupon here.


Posted on

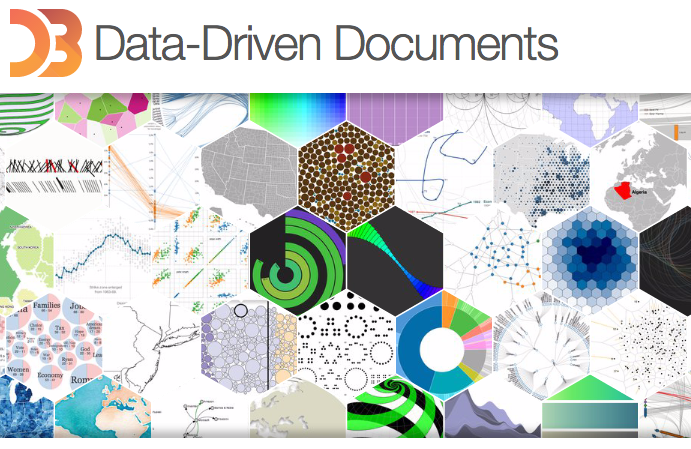
3 Advantage of learning D3JS

3 Advantage of learning D3JS


Learning D3 can take time, especially if you have no prior web development experience. Hence, D3 is probably not for people who want to just quickly expand their visualization skills. Now back to the top 3 reasons for learning D3

1. Lots of examples.

Here’s a secret about creating great data visualizations: take ideas from other examples you’ve liked! That’s often the most effective way to make you look like and become a master data visualizer.

And that’s the great news about D3: there are thousands – thousands! – of great D3 examples to work from.

See excellent curated lists of D3 examples here and here. Many of these examples are posted online because developers want others to re-use their code. Just be sure to give credit where credit is due 🙂

2. Vibrant open-source community.

When I have a question about D3 , I often Google the issue and then quickly find a great StackOverflow or blog post that addresses it. These extensive (free!) resources are available because of the very large and vibrant open-source community behind D3.

3. Knowing D3 = Hirable skills.

Data Science and analytics skills are top trends and when it comes to analytics over web D3JS is preferred because of its powerful libraries and responsive capabilites.

Download the eBook For Free


d3js2-001
Posted on

Tips and Tricks for Students learning UI5

In this VideoĀ blog, Our CTO Ajay is sharing some of his experiences when he was learning UI5 and D3JS.


Posted on

Events in UI5 in 3 Simple Steps

Event means action . The most common types of event are Click, Tap, Drag, Press, Change, Focus, KeyPress  .

Let us refer to our previous project which we have done earlier here .

So, at the time of pressing the submit button, we will execute a particular function so that an event will get fired.

Here we will use the onChange event handler function.

Step1:-  Let us go to the API reference URL and search for sap.m.input and again search for the liveChange event from Here .

Now , let us go to our demo.view.js page and create a function over there with the name as liveChange :-


var oSimpleInput = new sap.m.Input({
liveChange:[oController.liveChange,oController],
placeholder:"Enter Name"
})

Step2:- Let us create a function in our demo.controller.js with the toast message creation function which will be displayed on top of the page the string that is typed by the user :-


liveChange: function(oEvt){

var sValue = oEvt.getParameter('value');
sap.m.MessageToast.show(sValue);
},

Step3:- So here comes the output below and the change event is fired when the user writes any text on the text box:

Output


That’s all for now . Stay tuned for more 🙂


Posted on

More CSS Styling in UI5

Let us do add more CSS styling to the existing project which we have already done before from Here to make it like the screenshot below:-

Output

Step1:- Let us first open up the same project in eclipse IDE.

Next , let us create a CSS folder and create a CSS file named as style.css

CSS

and we will link this CSS file to the index page :-


<link rel ="stylesheet" type = text/css href="css/style.css>

Step2:- Now let us add the custom CSS class(.addStyleClass(“newForm”),(.addStyleClass(“hBoxForm”),(.addStyleClass(“vBoxForm”)))) to it :-


<script>

var oMyForm = new sap.ui.layout.form.SimpleForm({

content:[

new sap.m.Label({
text: "Simple Form"
}),
new sap.m.Input({
placeholder: "Simple Input",
}),
new sap.m.Button({
text:"Press me"
}),
new sap.m.RatingIndicator({
value:4.7
}),
new sap.m.TextArea({
value:"Awesome Text Area"
}),
new sap.m.DatePicker({

}),

new sap.ui.unified.FileUploader({}),

new sap.m.VBox({
items:[

new sap.m.Button({
text: "VBox Btn1"
}),
new sap.m.Button({
text: "VBox Btn2"
})

]

}).addStyleClass("vBoxForm"),


new sap.m.HBox({
items: [
new sap.m.Button({
text:"HBox Btn1",
type: "Emphasized"
}),
new sap.m.Button({
text:"HBox Btn2",
type: "Accept"
})

]
}).addStyleClass("hBoxForm"),


]

}).addStyleClass("newForm");
oMyForm.placeAt("content");

</script>

In our style.css file let us add the code below:-


.newForm{
 
width: 70% !important;
padding-left: 30% !important;
padding-top: 10% !important;
}


.hBoxForm{
padding-left: 30%;
}

.vBoxForm{
padding-left: 40%;
 
}

Now all of our CSS properties are working fine only the issue is with the vBox & hBox, so for that let us add the media query to it to get the responsiveness perfectly when we run the app on any devices.


@media screen and (max-width:600px){
.hBoxForm{
padding-left: 0%;
}

.vBoxForm{
padding-left: 18%;
 
}
 
}

Now let us change the color of the buttons HBox Btn1 & HBox Btn2  at the property level at the index.html page , which can be also found in the URL Here which contains Accept & Emphasized code  :-


new sap.m.HBox({
items: [
new sap.m.Button({
text:"HBox Btn1",
type: "Emphasized"
}),
new sap.m.Button({
text:"HBox Btn2"
// type: "Accept"
}).addStyleClass("newBtnGreen")

]
}).addStyleClass("hBoxForm"),


]

}).addStyleClass("newForm");
oMyForm.placeAt("content");


We can also do the color change of the buttons in CSS like inspecting on the button element and by doing hit and trial method in the browser

We will add a custom style class to the 2nd button :- 


 new sap.m.Button({ text:"HBox Btn2" }).addStyleClass("newBtnGreen")


in the CSS:-

 
.newBtnGreen>.sapMBtnInner{
 
 background: green;
}
} 

Step3:- Finally , here comes the final desired output as below:-
Output

That’s  all for now, Stay tuned for more 🙂