SAP HANA IoT and The Internet of Things

If you have not seen yet, double check the introduction, the first part and the second part of this SAP HANA IoT series.
Today, in this article we are going to perform:
Step 2 – Connect Raspberry Pi to Arduino and able to establish the same configuration which was achieved via computer and Arduino
Since there are many sub-steps, we will cover this step in this part 3 and the the following part 4 of this series.
Here, we are going to do the Raspberry Pi configuration and connecting it to the Arduino Uno.
Raspberry Pi is capable of running a complete operating system and the real advantage is the capability to running with so less power consumption and the easiness to interface with other micro-controller and digital/analog devices .

Why do we use Arduino here ?
Raspberry Pi is a fine little computer board, though not nearly as good as the Arduino when it comes to I/O capabilities.
Since our experiment has a sensor network setup, it will be simpler to interface it with Arduino Uno.
Once we have the Arduino connection setup , then we can connect the Raspberry Pi through serial connection and do wonders with it.
Now, we are going to see how you can setup the connection of Raspberry and Arduino Uno in 10 simple steps:
Step 1: Download the RASPBIAN OS in Raspberry download section.

Step 2: Write the image to the disc (SD card) using Win32 image. Bear in mind that If you copy and paste the disk to image then it will not work.

Step 3.Open the SD card in your computer and add following line to the end of file cmdline.txt. Make sure that you leave a line break at the end, as in Linux it will be assumed to be execution of the command. It will be better to use notepad++ to edit, as sometimes notepad can insert some windows specific characters in the file which will not work in Linux (Raspberry system).

In the above image , the Raspberry IP address is first one and our Ethernet port IP is second one. This will enable to connect Raspberry Pi to the Internet through our computer.
Step 4: Change the IP of your Ethernet port to the IP which you have specified in the config file. In this tutorial, it is 192.168.137.1

Step 5: Install Xming and Putty. Putty will be used to establish a SSH connection to Taspberry Pi and Xming will be used to create a graphical session .Download link of Putty and Xming.
Step 6: Once you have installed them, run Xming server and then open Putty.
.
Enter the IP address of the Raspberry Pi you configured in step 3 i.e :192.168.137.10
Also make sure that you have SSH enabled in X11 :

Now press open.
Step 7: It will ask for user name and password: username is pi and password is raspberry

Now you are inside the Raspberry Pi 🙂
To view the graphical interface, you have to type lxsession and if everything is correct you will be able to see the graphical navigation window of Raspberry:

Step 8: After you have closed the graphical session using CTR+ Z, install Arduino to Raspberry, using the bellow commands:
sudo apt-get update
sudo apt-get install Arduino
After the installation, you will get a success message as well.

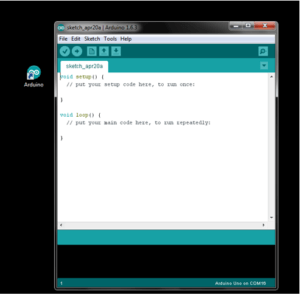
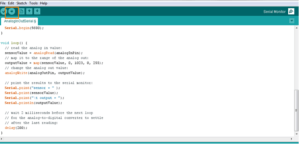
Step 9: Open the graphical session again using lxsession command and open the Arduino sketch IDE that has been installed:

Step 10: Now we have the Arduno’s sketch installed in the Raspberry Pi OS. This final step is to check if we can see the serial port connection visible (/dev/ttyACM0 in Raspberry OS).

We will use this port for our devices’ communication, in the use cases.
In part 4 we will install Java in order to enable a Java program to communicate with Arduino’s serial port 🙂